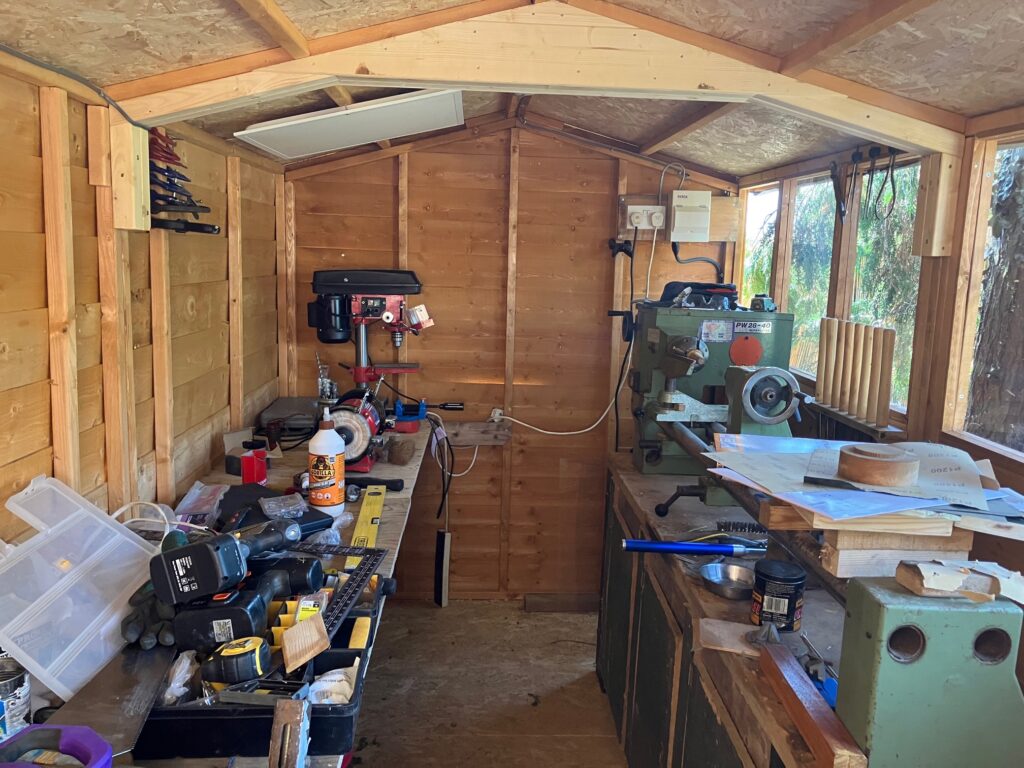
Hurrah!! The days of our garden doubling up as a workshop are finally over!! No more lathe. No more hammers and saws. No more power tools and extension cables.

Peace, quiet and calm has resumed.
Our garden table has become an outdoor pizza preparing space again rather than a workbench and we can now look forward to a carefree summer of margheritas and cocktails on the decking rather than stepping over trip hazards and picking wood chippings out of our salads.
It’s been a long, hard labour of love. But, my goodness, it’s been well worth it.
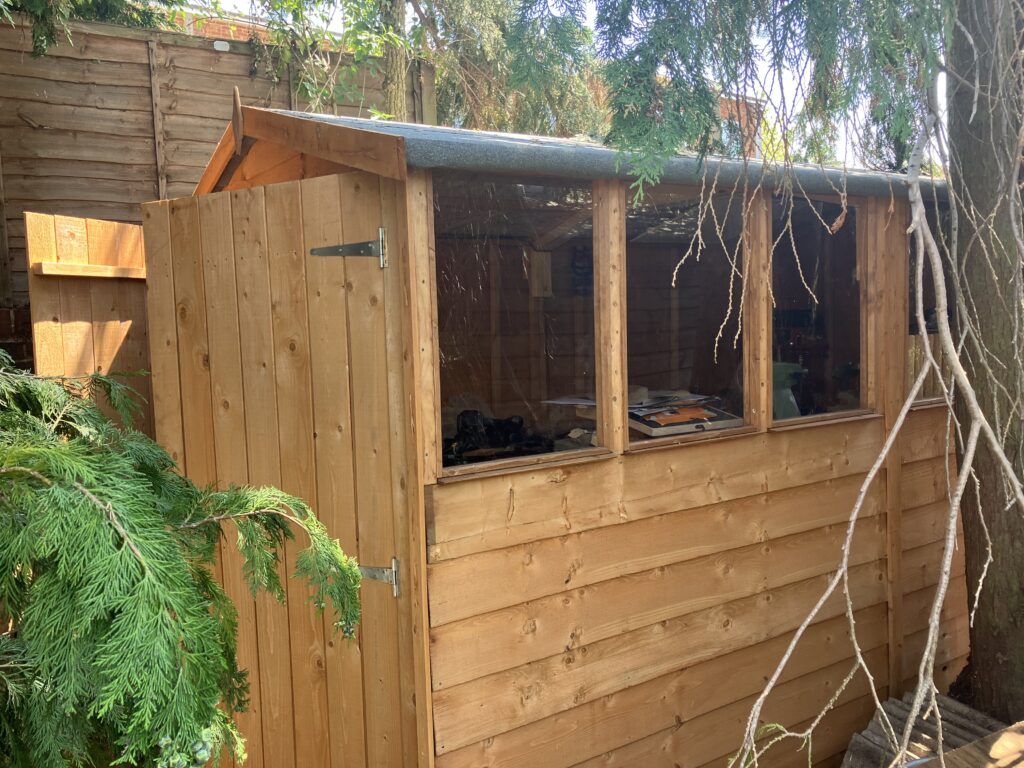
My husband now has his longed for workshop up and open for business. His man den is complete.
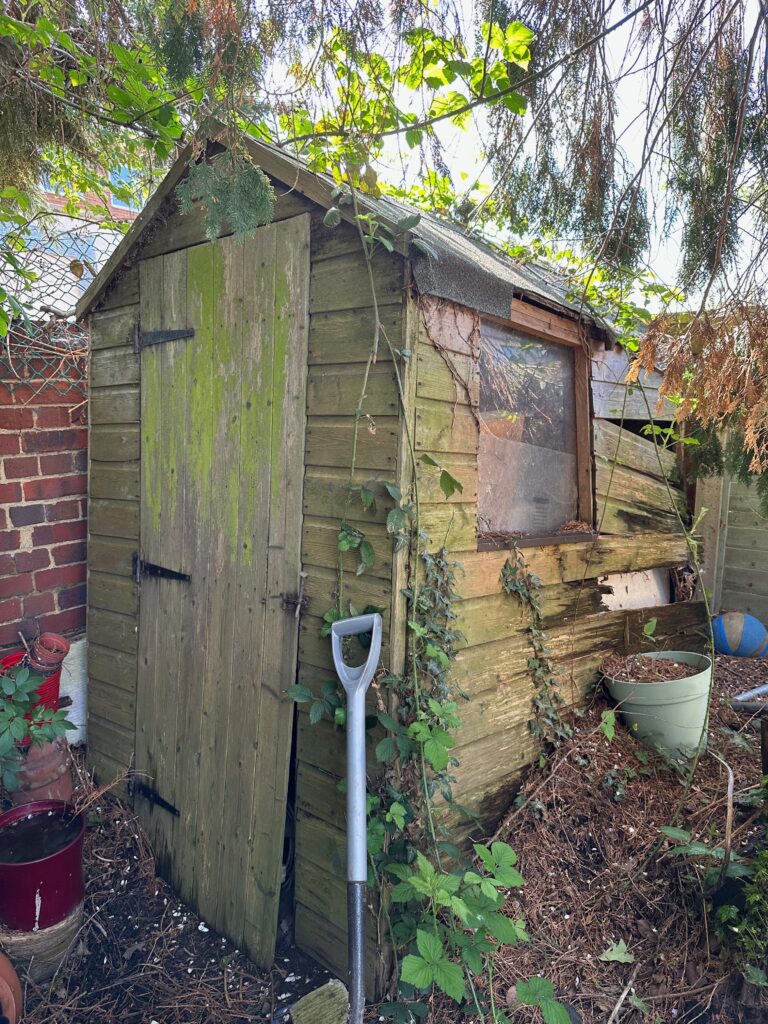
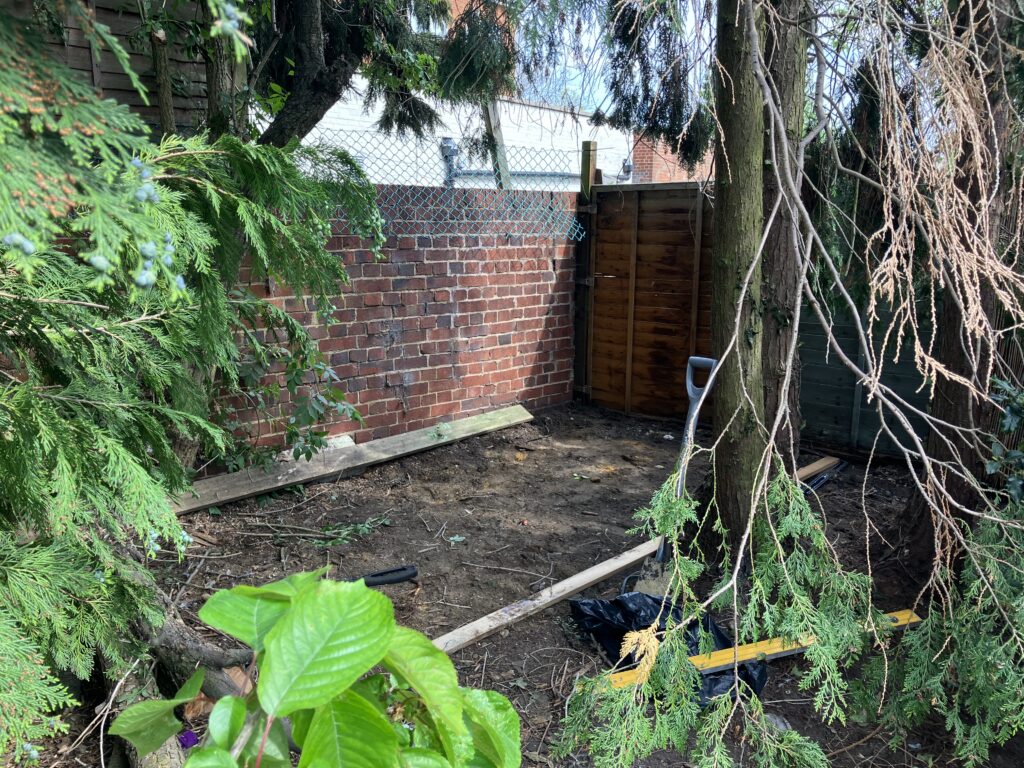
Our starting point was investing in the Shire Overlap Double Door Dip Treated Shed 10×6 – an ideal garden workshop with plenty of windows for plenty of light so you can see what you’re doing which is always a plus. And it was a good fit for the space we had after dismantling our original shed that we inherited over 22 years ago when we bought the house and has been slowly falling down around its contents ever since!!
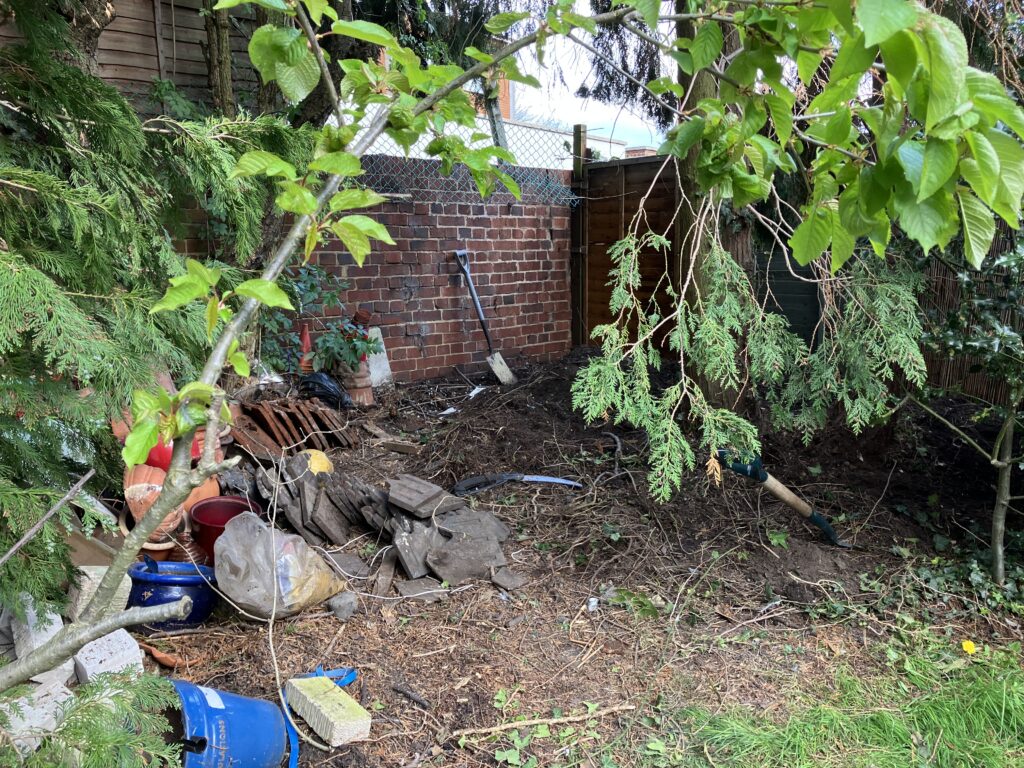
After marking out the base size of the shed, leaving enough space alongside the boundary walls for us to have easy access for maintenance and treatment in the years to come, my husband levelled out the soil – a rather backbreaking task it has to be said but certainly good (I can vouch) for his glutes!
He created a frame with planks of wood using a spirit level to ensure it was completely level and placed them around the footprint measurements of the shed. Each plank was secured in place with stakes driven into the ground at both ends. He cut a fifth plank slightly longer than the width of the frame with the bottom corners cut away to allow it to slot inside, butted against the top of the frame (like a really fat letter ‘T’). He moved this plank backwards and forwards along the length of the frame to scrape off any excess soil and pack down areas where the ground was too low. He then added a layer of sand and, again, moved the plank backwards and forwards over the top of this to help compact everything even further.
Once he was happy the ground was flat and even, he removed the frame and laid the base using steel reinforced paving slabs. We used these as a cheaper alternative to laying a concrete base, sourcing slabs from a local builder at a cost of about £120.
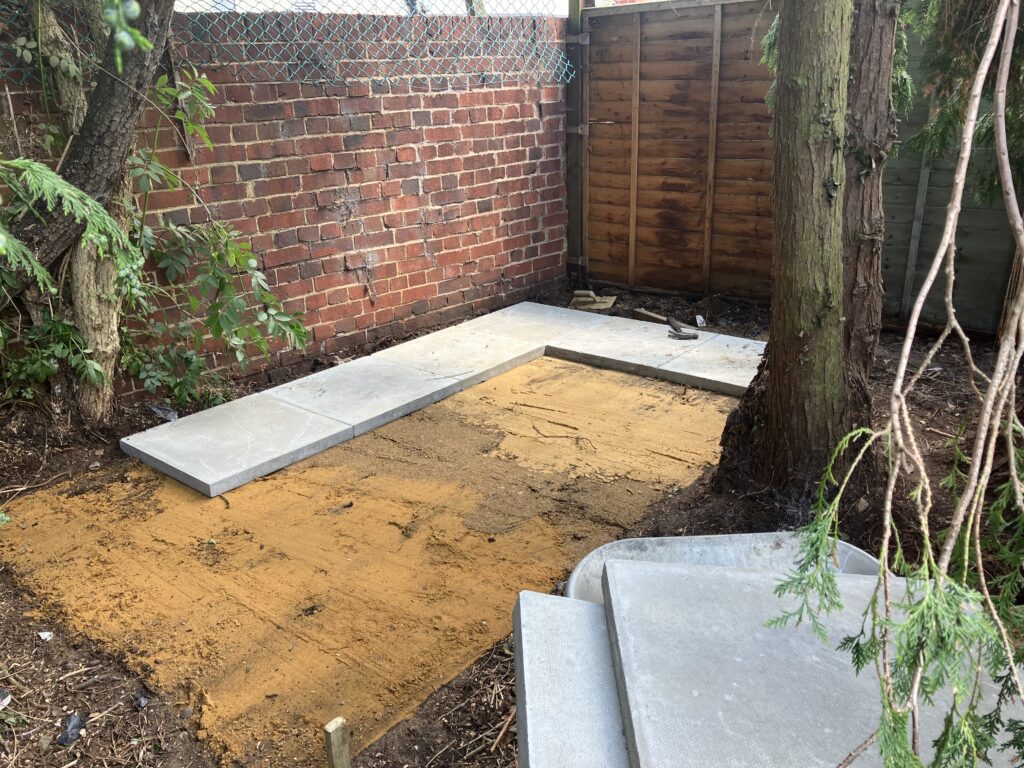
The next step was to lay a damp proof membrane (a waterproof plastic sheet) on top of the slabs to act as a barrier and keep the shed’s wood dry, so preventing any rot. The membrane should be no wider than the footprint of the shed and not overlap the edge of the slabs. If it’s any larger this can cause long term problems from rainwater pooling on the sheet and seaping into the foundations.
Once the membrane was in place, my husband laid the solid sheet board floor on top and the construction of the shed could begin.
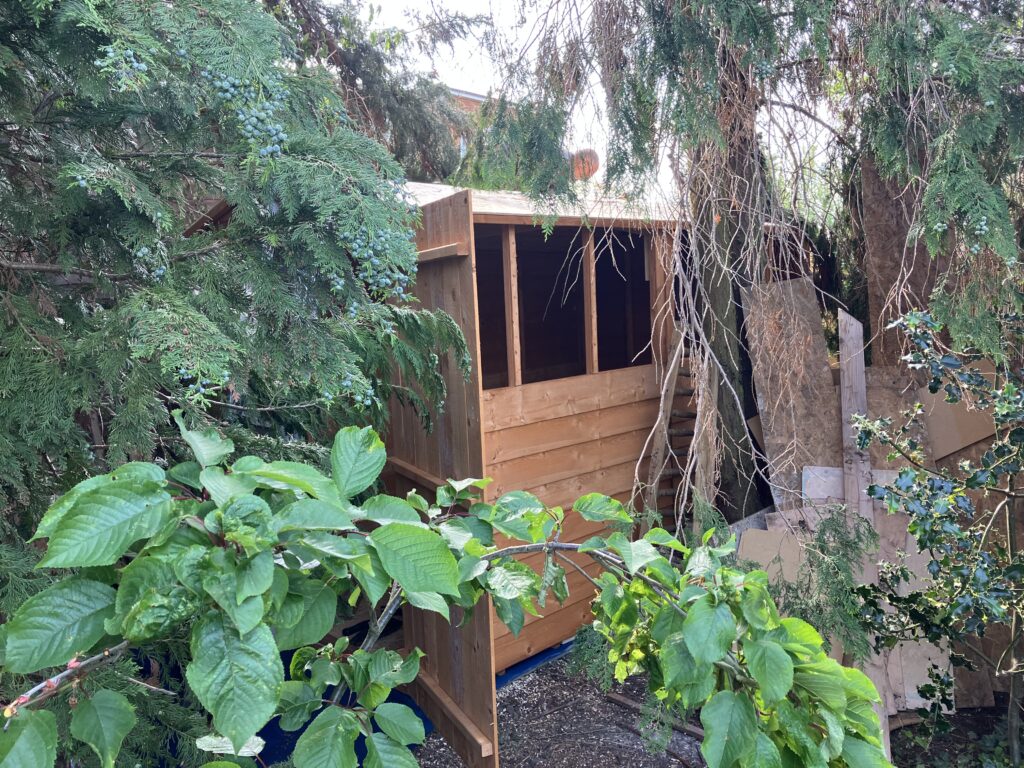
A straightforward build that only took a couple of hours, he then wasted no time getting a source of electricity run to the shed to power the lighting and various equipment, most importantly his lathe which has been an eyesore – and in the way! – by our back door for over a year and is thankfully now enjoying a new lease of life in its new home. As is my husband!
And it certainly hasn’t taken any time to fill…
So, after months of planning and digging and sorting and building, we are now finally organised. The garden is now a garden again and my husband has his special place where he can disappear to and create to his heart’s content and make as much mess as he likes while I soak up the sun on the decking with my Aperol Spritz. Cheers to that!