 After all the blood, sweat, tears and money spent on buying, installing and treating your log cabin, it makes a whole lot of sense to do what you can to keep it in tip top condition.
Continuous contact with rainwater will inevitably lead to your cabin showing wear and tear and will effect the life span of the logs.
Guttering is the answer.
This reduces the cabin’s exposure to rainwater falling from the roof by stopping it splashing back up onto the cabin walls.
So how easy is guttering to install? I’ve not actually done it myself, granted, but from what I’ve found out it does appear to be pretty straightforward.
Here are some tips on plastic guttering which is simple to install, robust and isn’t prone to corrosion problems.
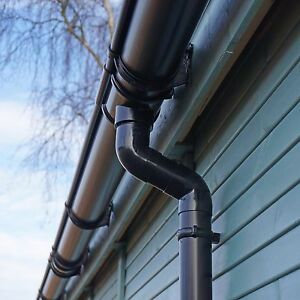
How to Install Plastic Guttering
- Guttering is designed to be screwed directly to the fascia board (the long, straight board that runs along the lower edge of the roof) or soffit (the material connecting the roof overhang and the side of the building)
- Fittings come with pre-drilled holes ready for attaching
- The guttering fits together with a clip system with a rubber washer providing the waterproof seal
- Clip one end of the guttering into the external stop end (fits around the guttering) which forms a watertight, sealed end
- Guttering is not designed to slope and is therefore fitted almost level – if it’s too shallow it will get a build up of dirt and if it’s too steep the water will run off the end
- It is recommended a 1mm drop for every 600mm of guttering is made
- Take the length of guttering and divide it into 600mm sections
- This will enable you to work out how many millimetres to drop from the starting point of the guttering to the running outlet (the fitting that is used to connect the guttering into the downpipes) which is designed to be fitted slightly lower than the base of the guttering that allows the water to run out
- Mark these measurements on the fascia board
- Start from the lowest point therefore fit the running outlet first
- Position and screw the fascia brackets about 75cm apart (no more than 1m)
- The guttering will expand and contract so the fittings are designed for it to be able to move
- Once the length of guttering has been fixed into the fascia brackets, clip an internal stop end (fits inside) into to the running outlet
- The downpipe (the pipe that is used to direct rainwater away from a building from the roof guttering) slots onto the bottom of the running outlet
- The downpipe is held in place at the side of the cabin with downpipes clips which should be about 1.5m apart (not more than 2m apart) and are secured by screws
- Finish the bottom of the downpipe with a shoe fitting which ensures that any rainwater is directed away from the bottom of the building
Click here for handy video: How to Install Plastic Guttering
Ideally don’t position the cabin under trees – this will prevent leaves and debris falling on to the roof and blocking the guttering.
However, iff this is not possible, a mesh cover on top of your gutters will help keep the debris out and continue to allow rainwater to filter through.
Don’t forget, an added bonus with guttering is it enables you to collect the rainwater in water butts to use in your garden.
Rainwater is much better for plants than tap water as the chlorine and other substances, ie. treatment chemicals, minerals and pharmaceuticals, hinder nutrients which can reduce the growth and health of plants. And it’s softer too, soaking deeper into the ground.
A water butt is easy and cheap to fit can be fitted to any downpipe where there is space to sit a container either directly underneath or nearby.